When learning JavaScript, many beginners can get hit with unexpected CORS errors. They need to practice fetch, GET, PULL promises, async/await. Most tutorials use API's/endpoints that allow CORS.
Many new programmers, after following a tutorial or two, will want to choose a real API to practice their skills. They do exactly what they learned, but encounter CORS errors. Programmers will understandably want to practice their new skills on their own, and may likely choose to practice with an API that they have found, that doesn't allow CORS.
If this sounds familiar, you may have done some research already, you
will likely have found out that browsers do not allow fetching of most
datatypes, unless they come from the same origin and port. You may
also learn that you need to change the server settings to allow CORS
on the backend. But this API is not yours, so you can't set the server
to allow-cors!
In many real-world environments, the website and backend server likely exist on the same url. That allows information to be fetched from external sources, because CORS restrictions exist for browsers, not for backends. And the server will do all of the external fetches. Note that this is my interpretation, and this may be inaccurate.
The CORS-Fixer software is a simple program, which was created to extract the complication for beginners, just wanting to practice, who do not own the API endpoint. Simply put it will allow you to fetch safely from external sources, and avoid the headaches that come with CORS. It uses a small, simple Express server and Node to make fetches for you. It's pretty fast to set up, and the entire process will be explained, step by step. This is designed for people relatively new to javascript, so most of this will hopefully be easy to follow and understand what's going on. Feel free to find out more about CORS on your own, the MDN Site is a great place to dig into the matter.
This guide assumes that if you are practicing fetch, async/await, promises etc, that you have a basic understanding of HTML, javascript, and file structuring/paths.
This application will require that you use a few other tools or skills listed below. These will be explained, step by step.
- Install Node (easier than it sounds)
- Use of the command line. Most steps are explained, but not navigation between folders. If you want to explore deeper into how to use command line, reading this article will help. Note: if you are using VS code as an editor, it has a terminal built in.
- Basic use of NPM (is included with the NODE installation, and will be explained)
- Registering for an API key. This is free, simple, and optional, but allows you to follow along with the example
- It is helpful, but not required, if you understand URL's. Particularly if you know how to concatenate one with query fields.
This is simple. Go to https://nodejs.org/en/download/ and install the appropriate version for your computer. You can easily remove it in the future. It comes with it's own installer. Note that you should leave the LTS version selected (do not select the current version with latest features). You should select the version that matches your operating system. Download the file and run the installer.
In order to run this project you will only need a few files, all of which are provided for you here on github: https://github.com/Leddfoot/easy-cors-fix. You can clone or fork this if you are comfortable with that. Or you can simply make a folder and copy the files into your folder
NOTE!:The file structure must be identical or the program and tutorial will not work!
The folder structure must be as follows (although you don't need the .gitignore, license, and package-lock.json, so just skip them if you wish):
Next you need to open a terminal, and navigate to the main folder, which is whatever you chose to name it. If you are unsure about how to do this, read the article mentioned above. Here you need to be sure that you are in the main project folder, whatever you named it if you copied the files. If you forked or cloned it, this will be the easy-cors-fix folder.
Once
you are sure that you are inside of the main project folder,
type the following command: in at your command line console:
npm install
If all goes well, npm will install the dependencies your project needs
( only express & node-fetch), You will see several messages in the
console. Some will say NPM: Warn. In most instances you will not need
to concerned with "warn" unless you see "error" somewhere. Near the
end of the output in the console you should see a line similar to
added 54 packages from 41 contributors and audited 54 packages in
            3.411s
Additionally you will now have a new folder, called node_modules.
Ignore it, it's outside the scope of this documentation, and you
should never modify files in this folder anyways.
You are now ready to start the server. If you are familiar with nodemon, use it instead of node. Before the server is started it is important to point out that it will not "hot reload," unless you use Nodemon. If you are unfamiliar with this, don't worry about it. What's important and that you need to know is that after you start the server in the commands detailed below, the server will continue running until you stop it. However, if you make a change to the server.js file, nothing will happen.
So it is important to remember that
Ctrl + C (Cmd + C on mac)
Navigate to the server folder, then enter the following 2 commands:
First cd server.
You should now be in the server folder. Note that your path in the
terminal should be something similar to C:\...YOURPATH...\server.
Everyone's will be different but what's important is that the path
ends in node server.js or the nodemon
equivalent in at the command line.
The server will start serving a small webpage. If successful, you will
see two messages in the command line, the second of which will be
Test server is running on port 3000
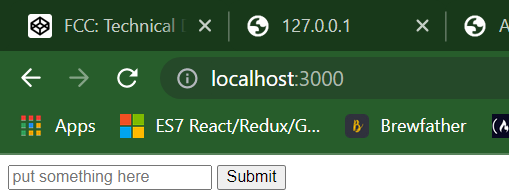
This should also open a page in your default browser automatically. If
not, open your favorite browser and navigate to
http://localhost:3000. You should see
a simple webpage like the one below.
Tip: If you are viewing this page on a PC, and if you hover over an image, it will automatically widen to the entire width of the page. This will help cut down on zooming in and out constantly if your vision is not perfect. If you find it terribly annoying, just take the mouse off of the picture and it will return to normal size.
A full explanation of the server file is included at the end of these documents. But for right now, all that you must know about the server file, is that when you give the Node command to start the server, it is configured to automatically serve a file called index.html in the public folder.
In addition, two endpoints were added to the server file. As long as
the server is running,
(don't try this just yet will, we will do this in the next
section)
and you type
http://localhost:3000/returnSomeJSON
into the browser, the browser will receive a small dummy data file
If you type
http://localhost:3000/nodehttp, this
leads to the endpoint which we will use to fetch from an external API,
without invoking CORS (remember, servers do not have CORS
restrictions, only browsers).
Here you have an option, you may just follow along with the description of what is happening, when the connection to the Vinmonopolet API is described, and then afterwards test your own API, after you understand the process.
Alternatively, you can get an API key yourself and follow along. To get a key navigate to https://api.vinmonopolet.no/signup. After registering you will receive an email with 2 api keys. Just use the primary key at the point that you need it.
Note that here we will first just plug in the necessary stuff, make it work, and see how to add a query in this section. What is happening and why will be explained in the next section.
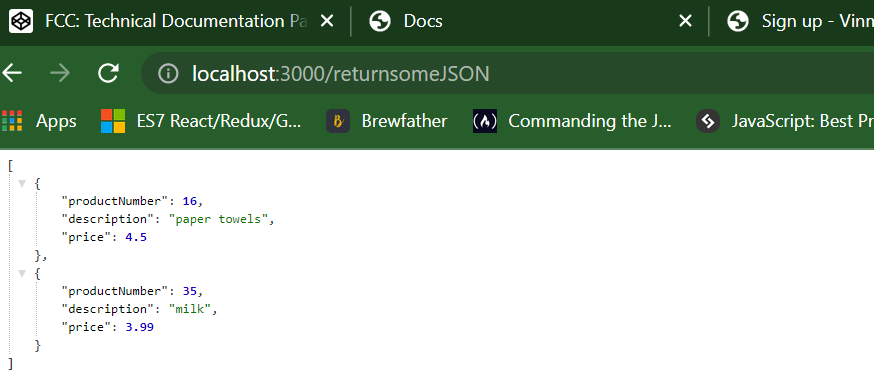
First we will just test the server, with some dummy json information.
In the address, at the top of your browser, which should be at
http://localhost:3000, add
/returnSomeJSON (case-sensitive), to
the end, so that the address is now:
http://localhost:3000/returnSomeJSON. Note that JSON is in all caps.
You should see some dummy information returned from the server:
Press the back button on the browser and you should see the input box
and the button. Press the submit button. Open your browser's console
(ctrl + shift + i on windows), and
you will see 2 different items being logged. These are all originating
from within app.js. The last log, after submitted, is the same dummy
object we saw before pictured above, it's just now being logged into
the console. This gives you an idea of how to get json data and be
able to work with it.
The last line of code in the app.js file is an event listener, tied to the form submission that calls the testFunction() function in the app file. testFunction() is just a standard asynchronous fetch.
Now change the last line of the app to:
form.addEventListener('submit', sendFetchViaServer)
In the terminal, stop your server. In Windows this is accomplished via ctrl + c. Then restart your server with node server.js. Refresh your browser and make sure it is still pointed at http://localhost:3000. The app is now trying to fetch data from an external source.
You can see this in 2 places. This is logged in your (NODE) terminal,
and should just state
statusCode: 401. If you open the
browser
console, you should see an object that begins with
{statusCode: 401, message: 'Access denied due to invalid
            subscription key
...etc.
If you are just following along the response is shown in the following picture, in the bottom of the terminal. We will fix the 401 error next.

The error was occuring because we don't have a valid api key for the
external vinmonopolet API. If you decided to get your own key, you
will need to find the line in the server.js file, in the options
header that looks like:
'Ocp-Apim-Subscription-Key': 'YOUR API KEY HERE'.
Important! We will now add the api key to the code. If you are saving your project in a public place like github, it is important that you do not push your changes there. Your API key will become visible to anyone and everyone. Here is a good example of how to hide your key from github, using .gitignore https://gist.github.com/derzorngottes/3b57edc1f996dddcab25.
Remove: YOUR API KEY HERE, and replace it with your api key. Note that you need to leave the quotes ' ', and put your key inside like so '123fakekey1B2u3L4L5s6h7I8T'. If you don't it won't work. Note: if you have moved your key to a config variable as was shown in the aforementioned article, then don't use the quotes just the variable name.
Important! Here you must stop the server (ctrl +c), and restart it with the same node server.js command!.
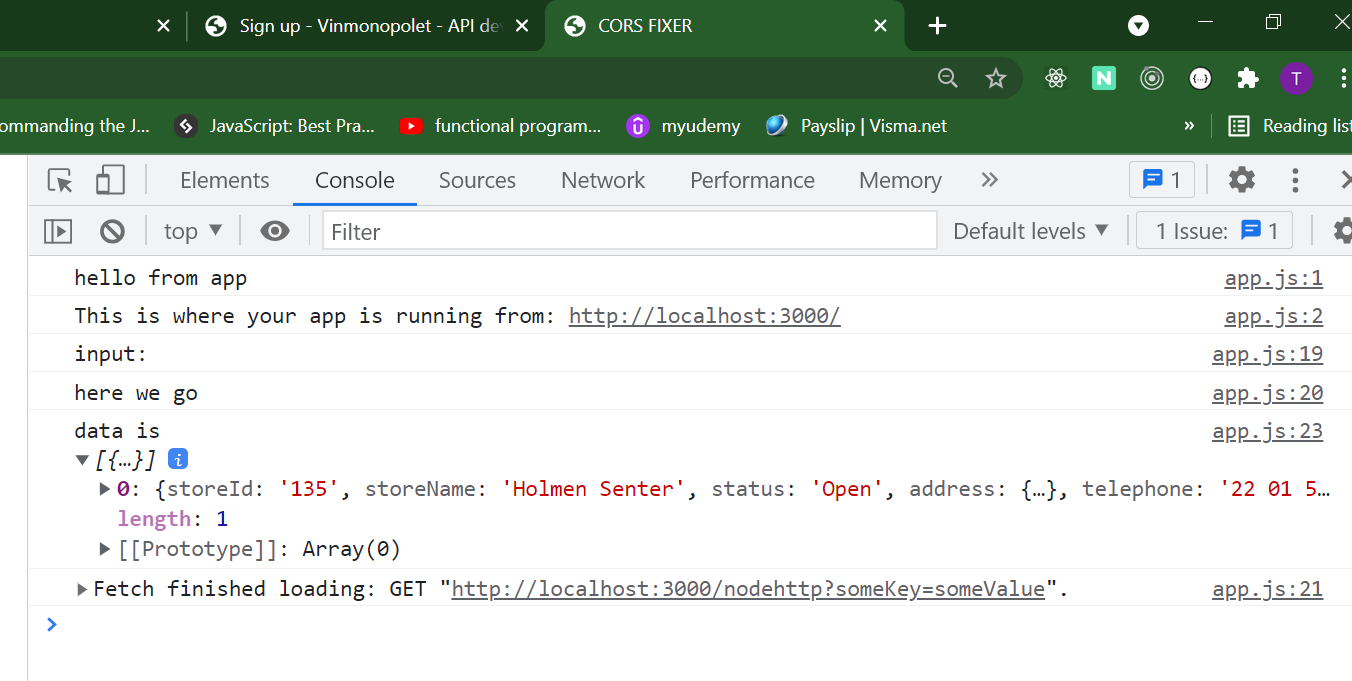
If successful, after you save your changes, when you push the submit
button in the browser, you should now see that the status code in the
Node terminal is now 200. And in the browser console, and if you click
and open the array right after
data is, it now contains a dataset as
shown in the picture below.
You have now successfully gotten around the CORS problems, and have a working model that you can use to test. But, there are things working behind the scenes that you need to know before you can test a different API. The most obvious and necessary is how to use a query, and how to set up your headers, which will be discussed in the next two sections.
So typically when you go to an external API, you want to get some data in return. Most of the time you will be searching/querying for something in particular. For example you may be looking for an item in the products dataset with an id of 35. Or all cars that have the color yellow. This is where you will begin to need to customize your own fetch, based on your needs. You will have to decide how to make your own query string fit the API that you want to use. But it helps by looking at our example, and we will use it to test this.
Before when we sent a successful fetch, we had not discussed how this
is happening. What is happening is that when you added
/nodehttp to your url, the browser
redirected to a url that was in the server. A new page did not load,
becuase the endpoint is not set up for this (although it is possible
if you want to). Instead what happened is that a method in the server
fetched external data, and returned it to app.js, where it logs to the
console as directed, at this line
console.log('data is',data)
That data is being returned from a method in the server file that
begins with
app.get('/nodehttp', ....
For now, let's just focus on the function fetchData(). This code is very similar to a javascript fetch, Node is indeed written in javascript. Just note that there are some subtle differences. For example, you have to import http or https into node, both of which I have already imported.
                const fetchData = () => {
                https.get('https://apis.vinmonopolet.no/stores/v0/details?storeNameContains=holmen', options, (res) => {
                    console.log('statusCode:', res.statusCode);

                    res.on('data', (d) => {
                        // process.stdout.write(d); //use this if you need to log the response from the external api, note that it logs in the terminal and not the browser console
                        handleData(d)
                    });

                }).on('error', (e) => {
                    console.error(e);
                });
            }
The data that was fetched is being fetched from the external API on
this url
https://apis.vinmonopolet.no/stores/v0/details?storeNameContains=holmen
The last part,
...?storeNameContains=holmen is the
query string. It is asking the external API to return stores whose
names contain the string holmen. The only way to know that you should
query using "?storeNameContains=" is to read the documentation on the
API. This particular API doesn't have much documentation, but it has a
section where you can test query the API from your browser. You can
see both the request and response, in several formats, like
javascript, python, curl, etc.
You can try that at this page,
https://api.vinmonopolet.no/api-details#api=stores&operation=GET_DETAILS.
Note that if you are not logged in that you will get a 404 request
denied response after you press the try it button.
If you want to test other cities, you can enter "sandvika" in the
storeNameContainsField for a single result, or "oslo" for a dataset
with 33 stores. You can also change the query to ...?storeId=something
and search for a number. I just used "Holmen" because it is my
favorite local store where I buy my wine, and searched by the name of
the store.
For this example we only search using ...?storeNameContains=SOMETHING, and focus on making the SOMETHING to whatever is entered in our
browser input. For simplicity the value in the input box has already
been set up on the input variable in the app.js file.
To accomplish this we will have to first concatenate that information into the url that we send to our server. Then we have to adjust the server code to include it in the url used in the real external fetch.
In the app.js file, change the sendFetchViaServer() function so that it now looks like:
                const sendFetchViaServer =(e)=>{
                    e.preventDefault()
                    const input = document.getElementById('main-input').value
                    const url = `http://localhost:3000/nodehttp?searchingFor=${input}`
                    ///use this input above to  manipulate the query below
                    console.log('input: ', input);
                    console.log('here we go')
                    fetch(url).then((response)=> {
                      response.json().then((data)=> {
                        console.log('data is',data)
                      })
                    })
                  }
We have done two things here, we have placed the URL into a variable, and we are adding the input to the end of the url.
We have also decided to call our query searchingFor, although we could have called it kittens, it doesn't matter. What matters is that the ? query symbol is followed by a key and a value. In this case the key is whatever (searchingFor), and after the = sign this value will be whatever letters are in the input box.
If you don't understand what is going on here:
const url =
          `http://localhost:3000/nodehttp?searchingFor=${input}`
this is equivalent to:
const url = 'http://localhost:3000/nodehttp?searchingFor='

          url += input
You have now successfully passed the input that is in the box, to your server so it can use it to search the external api. If you save changes, this will not work yet, because we also have to make some small adjustments on the server to receive the search term and forward it to the external API.
Over in the server.js file, it will now receive your data. If you
uncomment out the line
console.log('req.query: ', req.query);, then type something in the input, and submit it, you will see it
the node console, as shown below.
But first, remember to restart the server! ;)
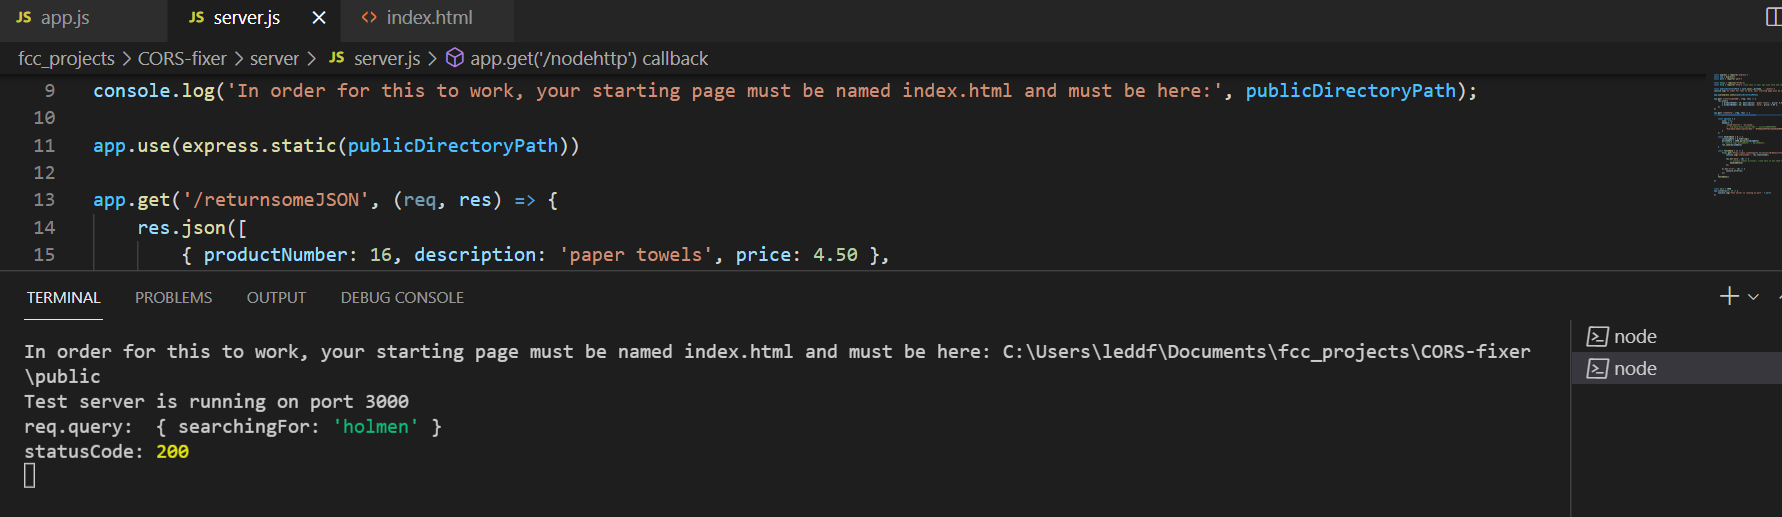
The app.js is passing a request.query property which in this case is
an object with a key value pair. In this case
{ searchingFor: 'holmen' }. The
'holmen' bit will be whatever you have entered in the input in the
browser.
So now you can access this value on req.query.searchingFor. Note if you previously named it something else like kittens, then it will be available on req.query.kittens. You change the url in the server.js, like you changed the url in app.js, and it will dynamically fetch whatever you search for...but wait! You won't be able to access req.query.searchingFor inside of the fetchData function in server.js. It will be undefined because it is outside of it's scope. There are several approaches to how to fix this, but since you haven't got the explanation for the server code, it is best to follow this approach. We will concatenate the url like we did in app.js, but we have to pass it to fetchData.
The app.get('/nodehttp' method is
already setup to where it calls fetchData after it is declared. So we
just need to concatenate the url where we CAN access
req.query.searchingFor, and then pass it to fetchData(). For
simplicity the entire method, app.get(/nodehttp .. is included below.
Note: if you copy and paste the code in, you must change 'YOUR-API-KEY-HERE' to your key, just as you did before.
                app.get('/nodehttp', (req, res) => {
                    console.log('req.query: ', req.query);
                    const searchedFor = req.query.searchingFor
                    const url = `https://apis.vinmonopolet.no/stores/v0/details?storeNameContains=${searchedFor}`

                    const options = {
                        json: true,
                        headers: {
                            'Cache-Control': 'no-cache',
                            'Ocp-Apim-Subscription-Key': 'YOUR-API-KEY-HERE'
                        }
                    };

                    const handleData = d => {
                        incomingData = d.toString()
                        parsedData = JSON.parse(incomingData)
                        // console.log('parsedData: ', parsedData);
                        res.send(parsedData)
                    }

                    const fetchData = (url) => {
                        https.get(url, options, (res) => {
                            console.log('statusCode:', res.statusCode);

                            res.on('data', (d) => {
                                // process.stdout.write(d); //use this if you need to log the response from the external api, note that it logs in the terminal and not the browser console
                                handleData(d)
                            });

                        }).on('error', (e) => {
                            console.error(e);
                        });
                    }

                    fetchData(url)

                })
You can now successfully avoid a CORS problem, on the example vinmonopolet API. Try searching for 'sandvika' and checking that the console is now logging information about the sandvika store. Great! But before you can successfully implement this with your chosen API, you must understand headers, which is addressed in the next section.
When you are ready to test this on the external API of your choice, you are all but ready, except for headers. Unfortunately, the headers needed by other API's will vary from the ones that the example API used. If you are lucky they will explain which headers are needed in the API documentation.
The vinmonopolet API documentation doesn't really have a text explanation of which headers can and must be used. This is likely true of many real-world, non test APIS. You may be able to send an email and ask how to do it, and if you're lucky, you might get a response. In the case of the example API, in order to figure out which headers were needed, I was able to look at the example requests on the website; see the right side of the picture below.
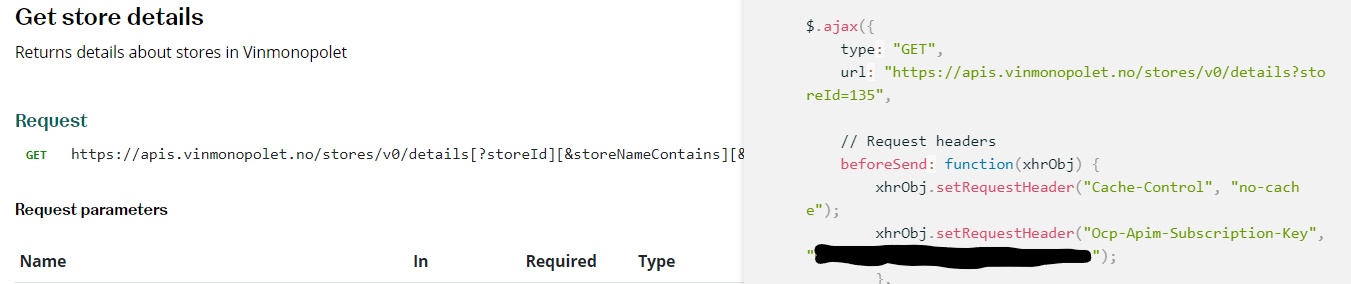
Unfortunately, if you don't send the right headers, it will not work with your API. Additionally, if you send the wrong headers, this may result in a CORS error. When using fetch I found it was much easier to just declare an options object, that contains a header object, as shown below. I say this because I have spent a bit of time on it, and this is the only way I could both make it work, and also understand what I was doing.
                const options = {
                    headers: {
                        'whatever': 'whatever',
                        'token': 'whatever'
                    }
                };
If you do have some headers that you want to try, just plug them in the object as key/value pairs and try it on the API you have chosen.
FYI: This options object is passed to the external API here
https.get(url, options, (res) =>. Try
to send the right headers to your API. If you have a problem, you may
be able to figure out what is happening by reading the response. The
status code is already being logged in the Node Terminal.console.log('statusCode:', res.statusCode). You can add another log on the next line, like:
console.log('response headers', res.headers).
This should give you an idea of what is happening, even if you are not a master of headers. Note that if you are unlucky enough to create a CORS error by sending the wrong header, you may not get much information in the response.
You can also try emptying the options object, like so:
const options = {}. However most real
API's want some form of identification key. If you figure out what
they call it like access-token, or Ocp-Apim-Subscription-Key like the
example API uses, you can try sending the options object like it is
shown below, just replace 'token' with whatever they call their key,
and put the key in the right side.
                    const options = {
                        headers: {
                            'token': 'xzyTIHSLLUB1243'
                        }
                    };
Unfortunately, I cannot guide you any further, because all API's are different, but if you know the headers/authentication required, this program will help you to practice, without spending days pulling your hair out because of CORS errors. If you have followed along this far successfully, figuring out how to add headers will not be a great challenge. Most likely the greatest challenge will be figuring out what headers your API of choice needs.
A "deep dive" explanation of the code is being created. This content will be added here when it is finished.